A guest account in Windows OS allows users to access the computer, share folders and printers from remote computers. There are many ways to enable or create a Guest accounts.
Option 1: Enable guest account via Local Users & Groups
1. In the Start menu or taskbar search box, type Lusrmgr.msc and then press Enter key to open Local Users and Groups.
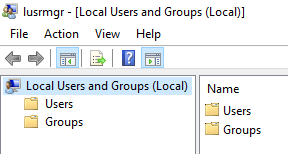
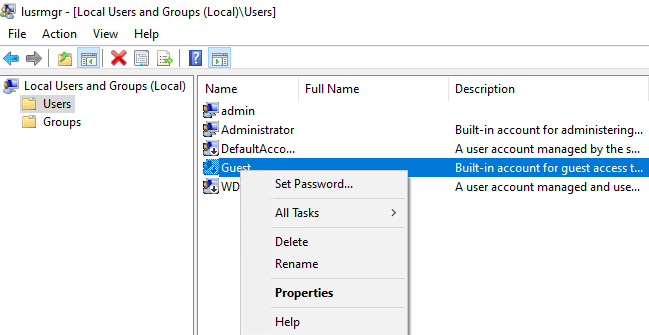
2. Click Users under Local Users and Groups (local).

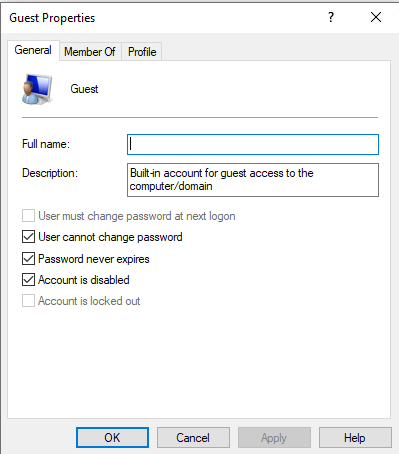
3. Right-click the Guest and then click Properties or double-click on Guest to open its properties.
4. Uncheck Account is disabled.
Option 2: Enable Guest account via Command Prompt
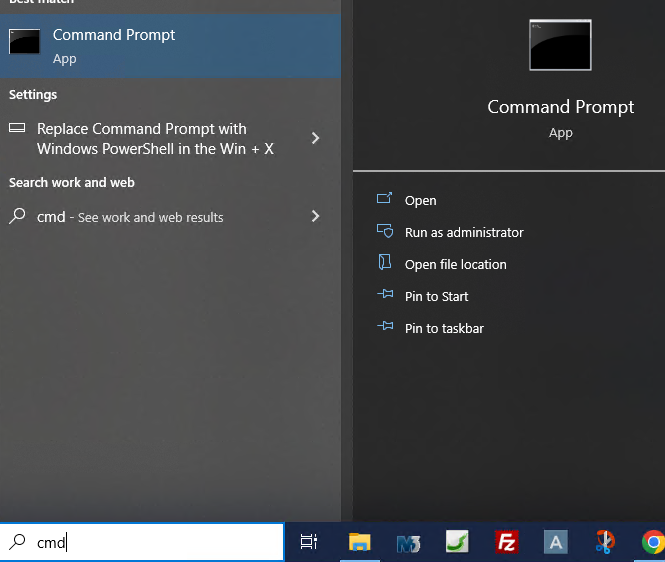
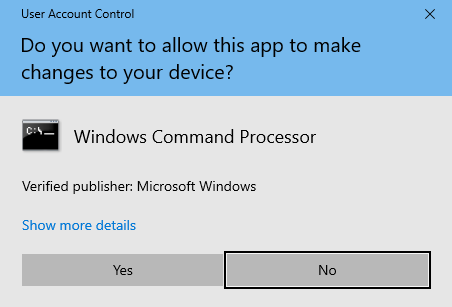
- Type CMD in the Start menu or taskbar search box, and then Run as administrator.
2. Click Yes when you see the User Account Control prompt.
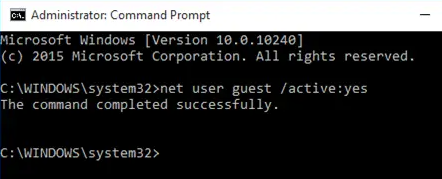
3. Type the following command and then press Enter key.
net user guest /active:yes
Option 3: Enable Guest account via Group Policy
Note that Group Policy is not part of the Home edition of Windows 10. So, this method doesn’t work on Windows 10 Home edition.
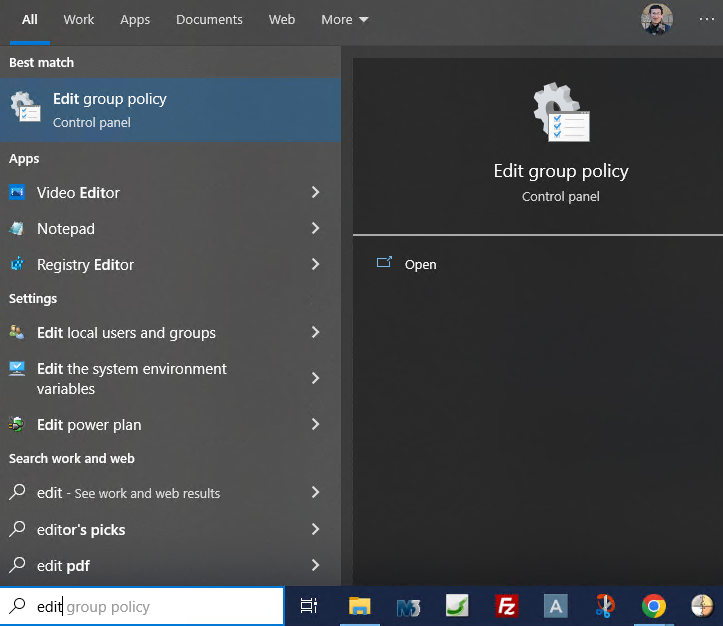
1. Open Group Policy Editor by typing Edit Group Policy in the Start or taskbar search box and then pressing Enter key.
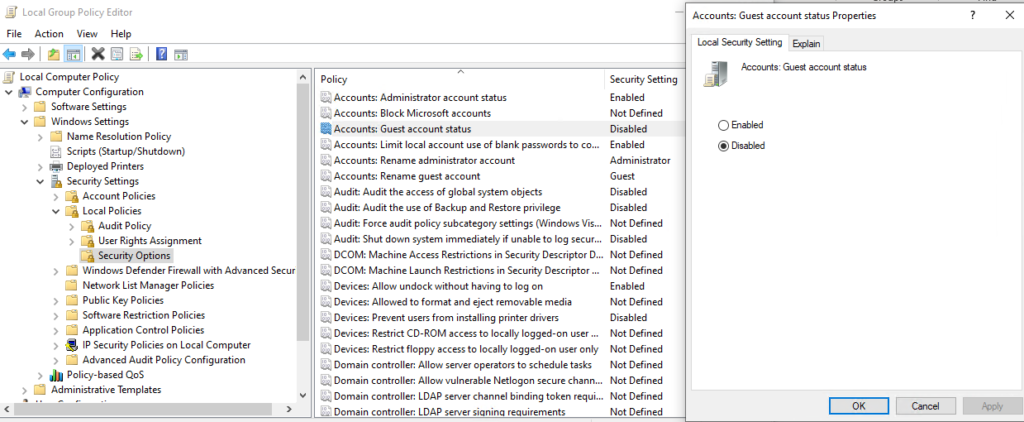
2. In the Group Policy Editor, navigate to the following policy: Computer Configuration > Windows Settings > Security Settings > Local Policies > Security Options.
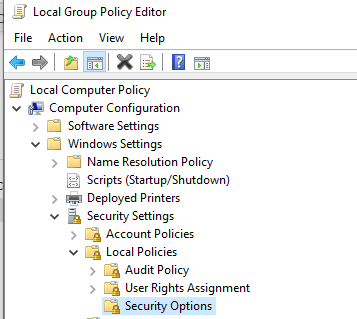
3. On the right-side, double click on Accounts: Guest account status to open its Properties.
4. Check Enable.
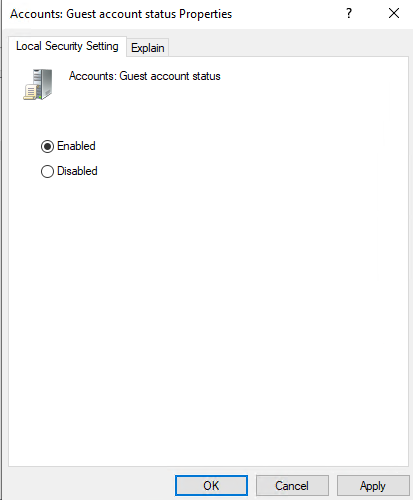
5. Click OK to save the settings.
Option 4 Create a regular user account using GUI
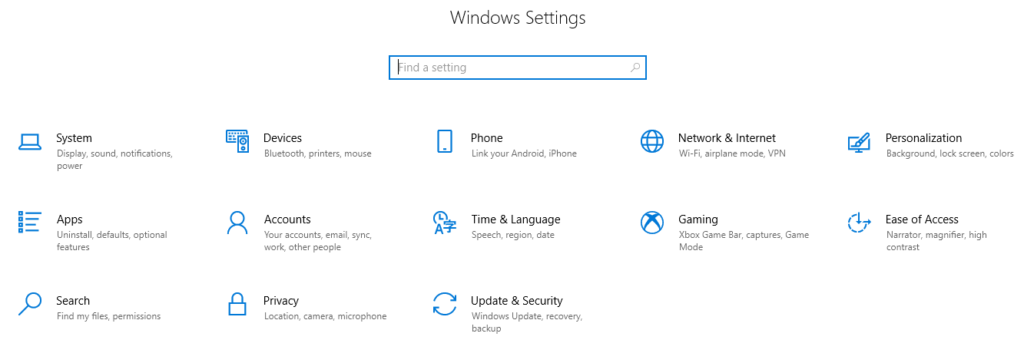
- Open the Start menu and click on the Settings icon.
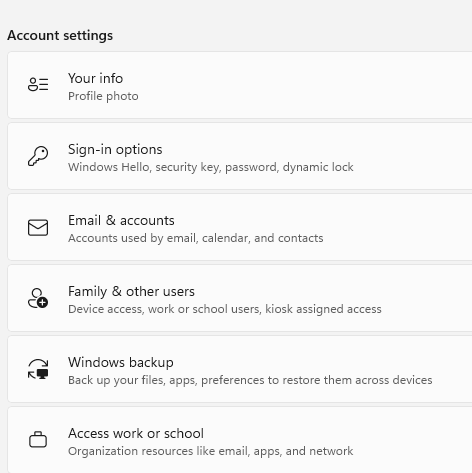
2. In the Settings window, click on Accounts.
3. Select Family & other users from the left-side panel.
4. Click on Add account in Other users.

5. Click on I don’t have this person’s sign-in information in How will this person sign in?.
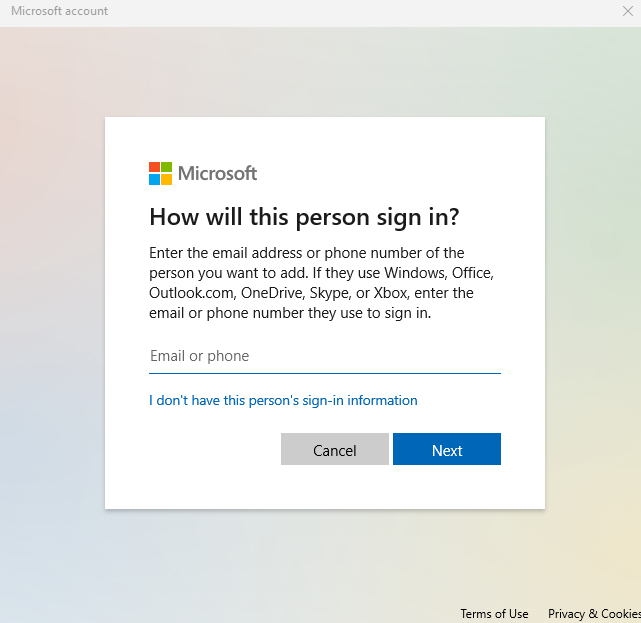
6. Click on Add a user without a Microsoft account.
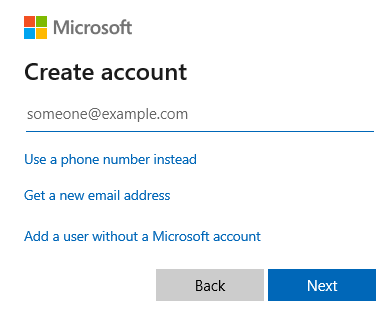
7. Click on Add a guest.
The Guest account will be enabled and you can use it to log in to the computer without affecting the main user account’s settings and files.
Update: Microsoft has hidden the Guest account from Windows 10 and 11. Also, Microsoft has moved almost all user account settings to the new Settings app, but there is no option under the Accounts section of Settings to enable the guest account. The Settings app only allows you to create standard local or Microsoft accounts.
To enable the guest account in Windows 10 and 11, we may have Mutiple options.
Option 1: Enable guest account via Local Users & Groups
1. In the Start menu or taskbar search box, type Lusrmgr.msc and then press Enter key to open Local Users and Groups.
2. Click Users under Local Users and Groups (local).

3. Right-click the Guest and then click Properties or double-click on Guest to open its properties.
4. Uncheck Account is disabled.
Option 2: Enable Guest account via Command Prompt
- Type CMD in the Start menu or taskbar search box, and then Run as administrator.
2. Click Yes when you see the User Account Control prompt.
3. Type the following command and then press Enter key.
net user guest /active:yes
Option 3: Enable Guest account via Group Policy
Note that Group Policy is not part of the Home edition of Windows 10. So, this method doesn’t work on Windows 10 Home edition.
1. Open Group Policy Editor by typing Edit Group Policy in the Start or taskbar search box and then pressing Enter key.
2. In the Group Policy Editor, navigate to the following policy: Computer Configuration > Windows Settings > Security Settings > Local Policies > Security Options.
3. On the right-side, double click on Accounts: Guest account status to open its Properties.
4. Check Enable.
5. Click OK to save the settings.