|
How to configure Remote Session Time Limits in Windows 7 - Step by step with screenshots
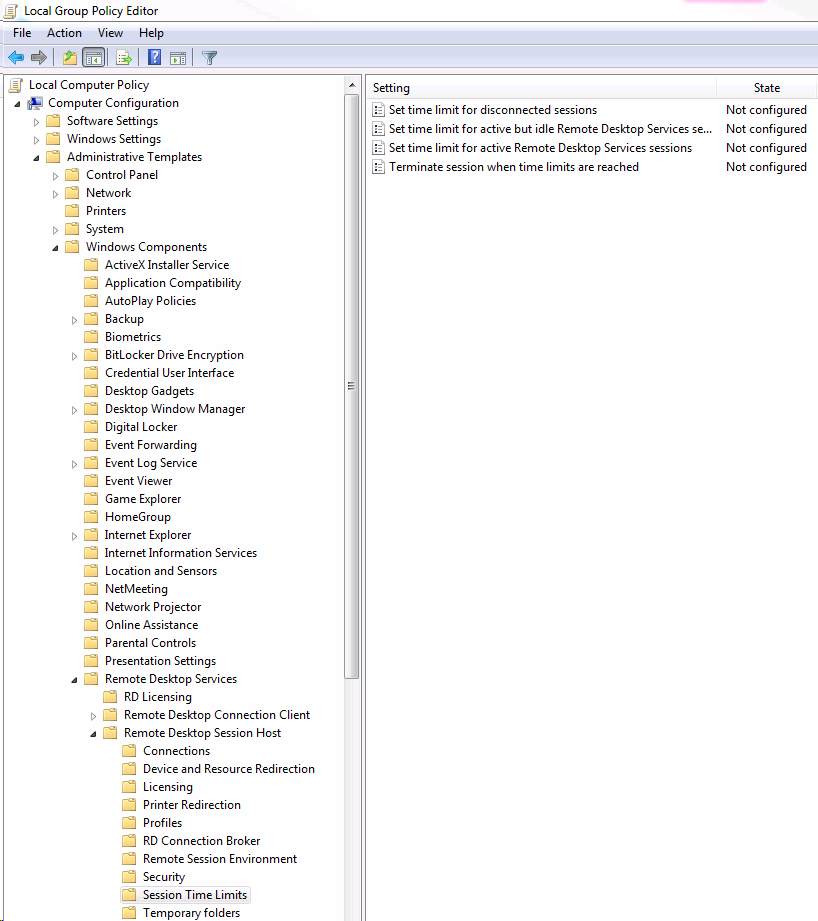
1. Run Group Policy on Windows 7.
2. Navigate to Local Computer Policy>Computer Configuration>Administrative
Templates>Remote Desktop Service>Remote Desktop Session Host>Session Time
Limits.
3. On the right pane, you have options to set time limit for disconnected
sessions, for active but idle Remote Desktop Service Session, for active
Remote Desktop Service sessions, Terminate session when time limits are
reached.

Alternatively, you can setup MaxIdleTime using Registry Editor
1. Open the Start Menu, then type regedit in the search box and press Enter.
2. If prompted by UAC, then click on Yes.
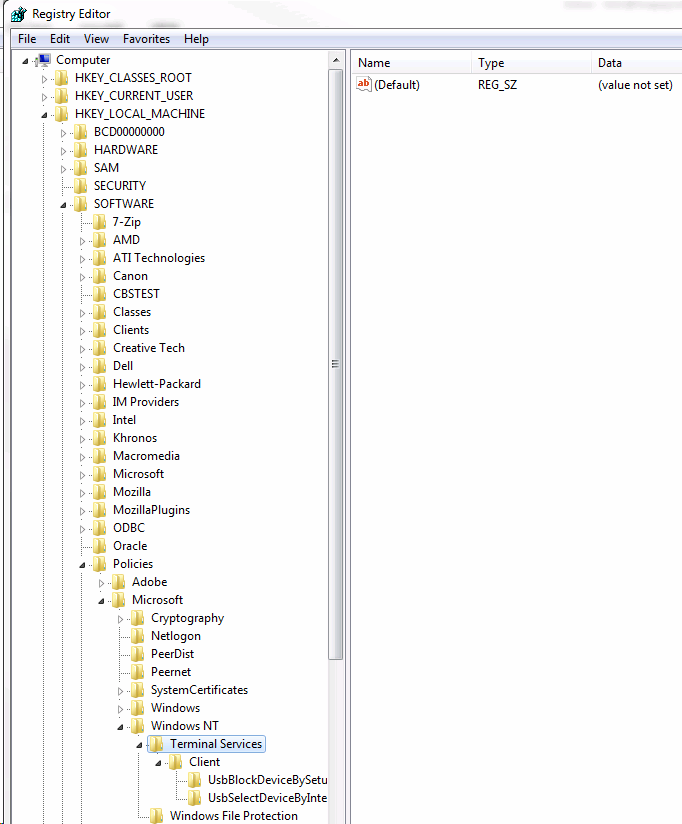
3. In regedit, navigate to the location below: (see screenshot below)
Code: HKEY_LOCAL_MACHINE\SOFTWARE\Policies\Microsoft\Windows NT\Terminal
Services
4. To Set Time Limit for Idle Remote Desktop Services Sessions
A) In the right pane of Terminal Services, right click on a empty space,
click on New and DWORD (32-bit) Value, type MaxIdleTime and press Enter.
(see screenshot below) -reg2_idle.jpg
B) In the right pane, right click MaxIdleTime and click on Modify. (see
screenshot above)
C) Select (dot) Decimal, then type in the registry Value data in the table
below for the amount of time you want to set as the time limit and click on
OK. (see screenshot below)
Name: Reg4_Idle.jpgViews: 30504Size: 23.3 KB
Time Limit Registry Value data
Never 0 (number zero)
1 minute 60000
5 minutes 300000
10 minutes 600000
15 minutes 900000
30 minutes 1800000
1 hour 3600000
2 hours 7200000
3 hours 10800000
6 hours 21600000
8 hours 28000000
12 hours 43200000
16 hours 57600000
18 hours 64800000
1 day 86400000
2 days 172800000
3 days 259200000
4 days 345600000
5 days 432000000
D) Go to step 6.Log off and log on, or restart the computer to apply the
changes.

Post your questions, comments, feedbacks and suggestions
Contact a consultant
Related Topics
|

This web is provided "AS IS" with no warranties.