This atile shows how to configure a site-to-site VPN between PA-850 firewall and AWS. Assuming the AWS has configured their site-to-site VPN and sent the configuration file to you. Here are the steps:
Step 1: Configure Tunnel
Step 2: Create IKE Crypto Profile
Step 3: Configure IKE Gateway
Step 4: Configure IPSec Crypto
Step 5: Configure IPSec Tunnel
Step 6: Configure Virtual Router
Step 7: configure Security and Policy Rules
Step 8: Commit the configuration and test
Step 1: Configure Tunnel
AWS configuration
edit network interface tunnel units tunnel.1
set ip 169.x.x.26/30
set mtu 1427
On PA-850
1. With Paloalto web utility open, Go to Network >Interface > Tunnel tab.
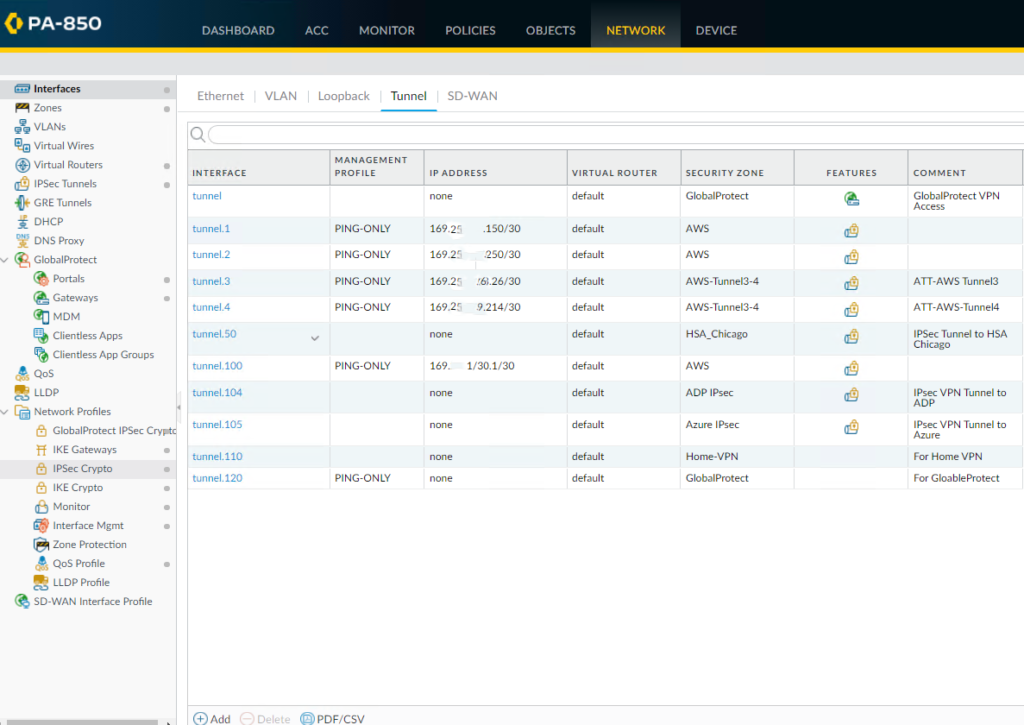
2. Click Add to create a new tunnel interface.

3. Enter the following parameters:
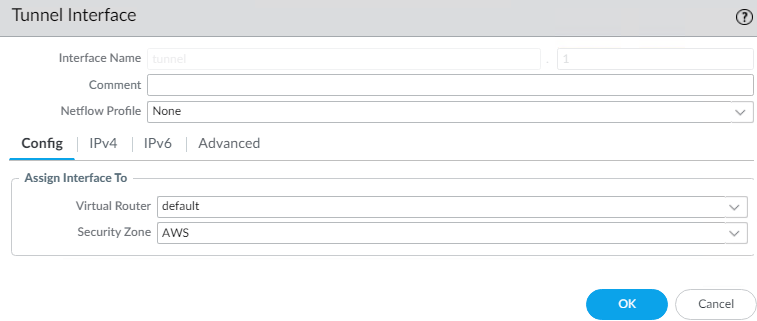
* Name: tunnel.1
•Virtual router: (select the virtual router you would like your tunnel interface to reside) Click OK to save the settings.
* Re-open Tunnel.1
* Create a new Security Zone. Or you can create the zone in Network>Zones
•Enter Zone name, for example AWS
•Click on Add under Interface
•Select the Tunnel.1 which you just created.
Click OK to save the settings.
•We need to configure ip-address since we intend to run dynamic routing protocols over the tunnel interface. However, if the Tunnel interface is in the zone where the traffic run Static Routing, configuring ip-address on the tunnel interface is optional
•To configure IP Address, click on IPv4 tab.
•Click Add
•Entre the public IP address for connecting to AWS.
* You may want to create a Management Profile, PING-Only in our example
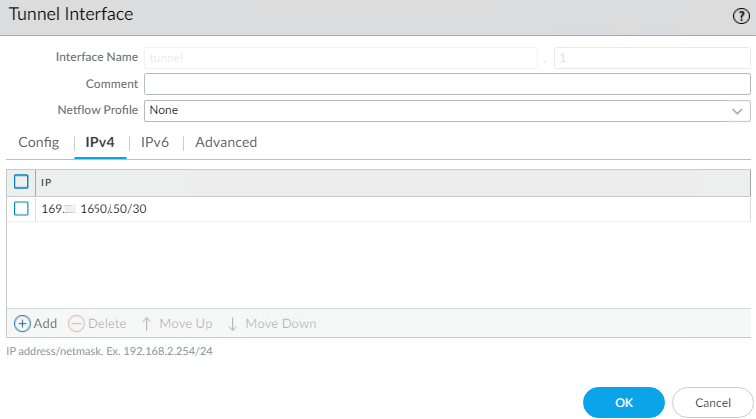
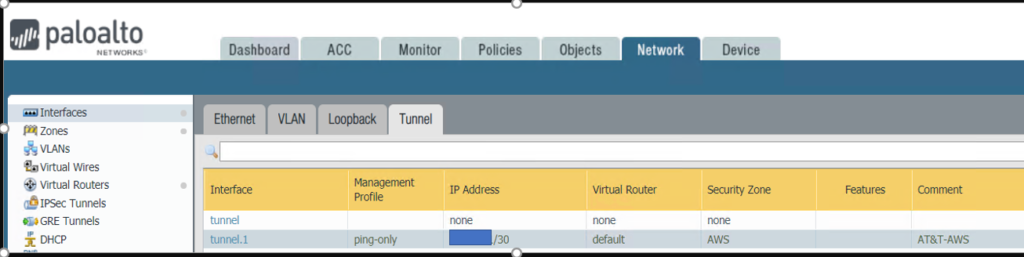
* The Tunnel.1 setting looks like this
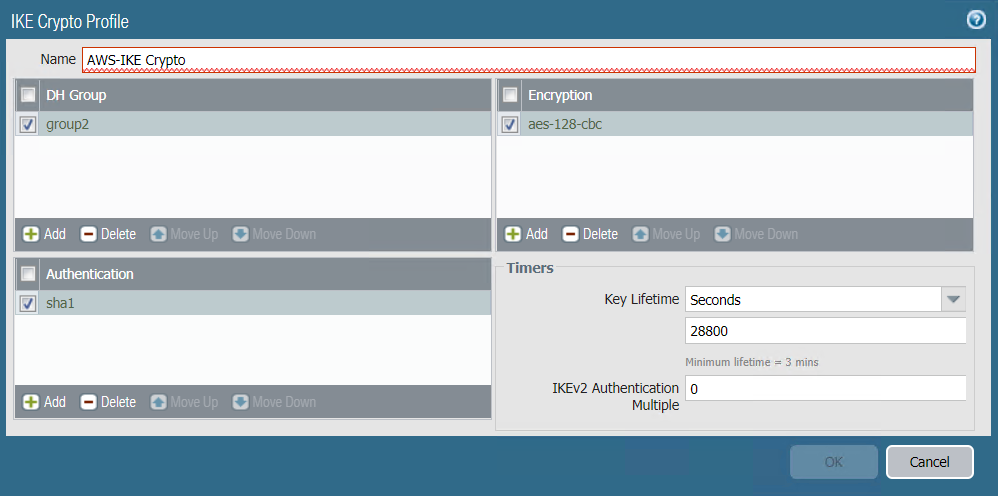
Step 2: Create IKE Crypto Profile
AWS configuration
configure
edit network ike crypto-profiles ike-crypto-profiles vpn-xxxx-0
set dh-group group2
set hash sha1
set lifetime seconds 28800
set encryption aes-128-cbc
On PA-850
•Go to Network>Network Profiles>IKE Crypto.
•Click Add
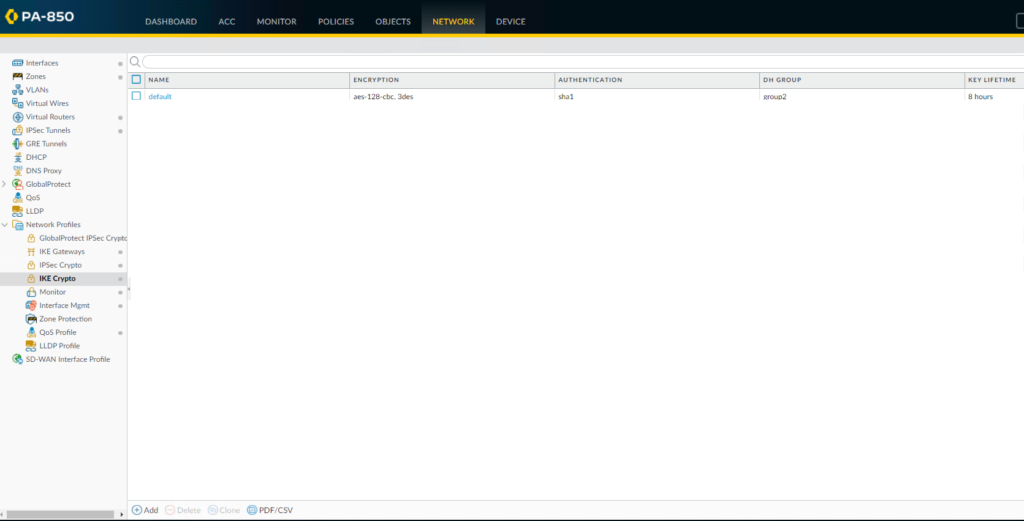
* Enter the IKE Crypto profile (IKEv1 Phase-1) parameters, which should match on the remote firewall for the IKE Phase-1 negotiation to be successful.
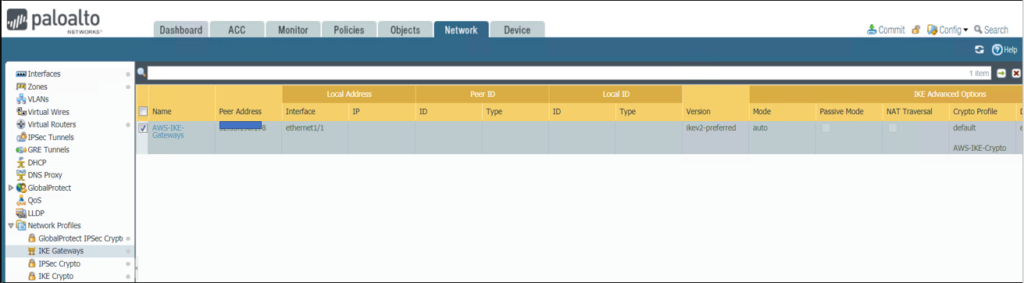
Step 3: Configure IKE Gateway
AWS Configuration
edit network ike gateway ike-vpn-xxxx-0
set protocol ikev1 ike-crypto-profile vpn-xxxx-0 exchange-mode main
set protocol ikev1 dpd interval 10 retry 3 enable yes
set authentication pre-shared-key key xxxx
set local-address ip 12.x.x.130
set local-address interface ethernet1/1
set peer-address ip 52.x.x.251
top
On PA-850
•Go to Network>Network Profiles>IKE Gateway.
•Click on Add to configure the IKE Phase-1 Gateway.
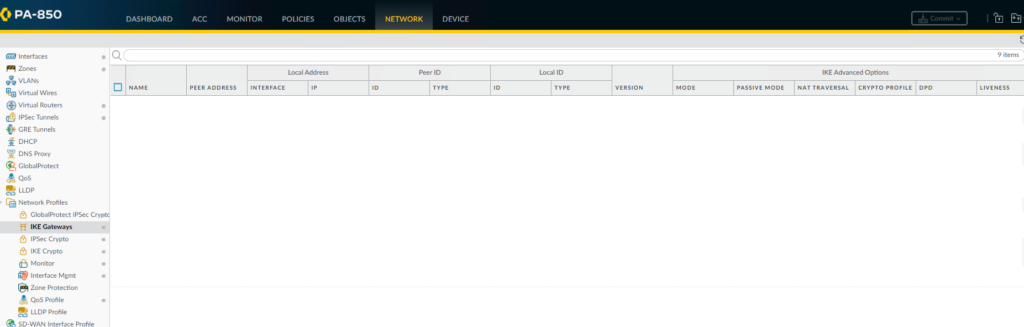
- Enter these local and peer IP addresses and info to match AWS configuration.
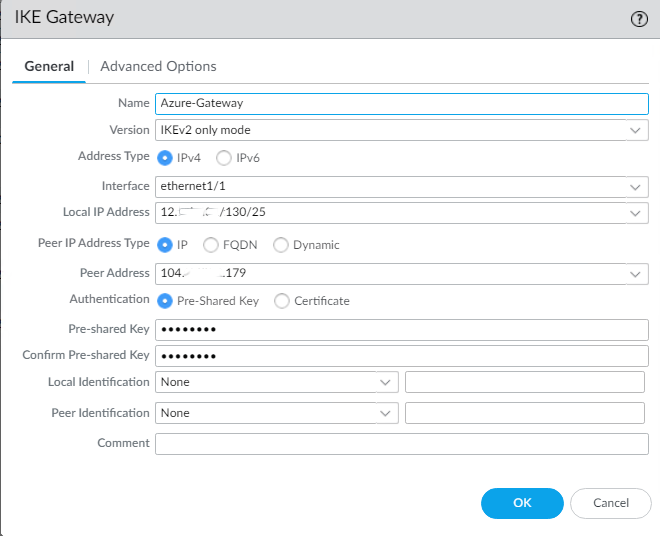
•Click on Advanced Options, select default as IKE Crypto Profile and 5 as Interval.
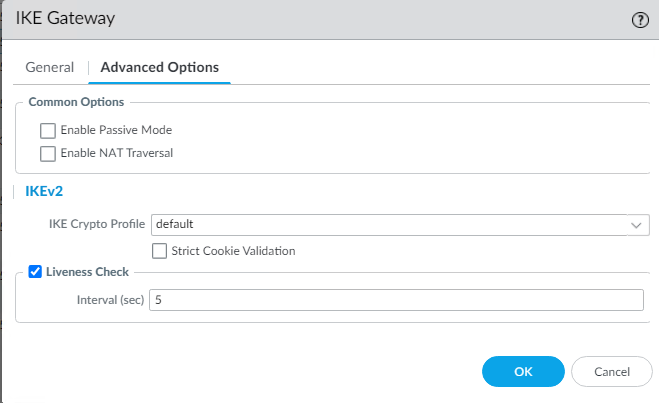
* The IKE Gateway configuration looks like this
Step 4: Configure IPSec Crypto
AWS Configuration
edit network ike crypto-profiles ipsec-crypto-profiles ipsec-vpn-xxxx-0
set esp authentication sha1
set esp encryption aes-128-cbc
set dh-group group2 lifetime seconds 3600
On PA-850
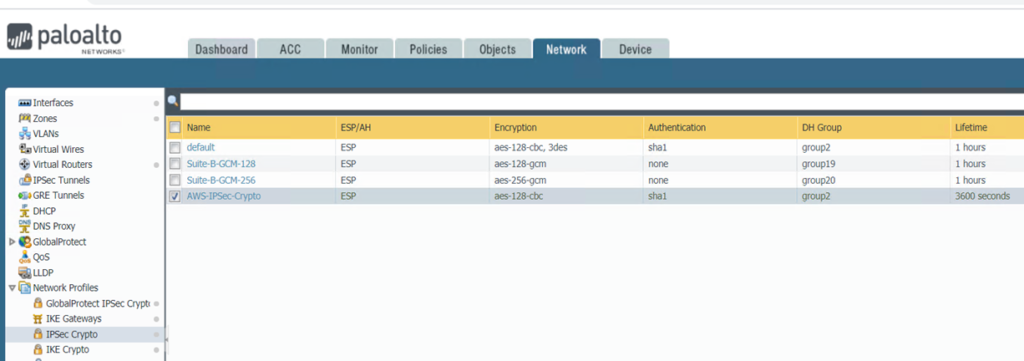
* Go to Network>Network Profiles>IPSec Crypto
* Click Add to create a new Profile
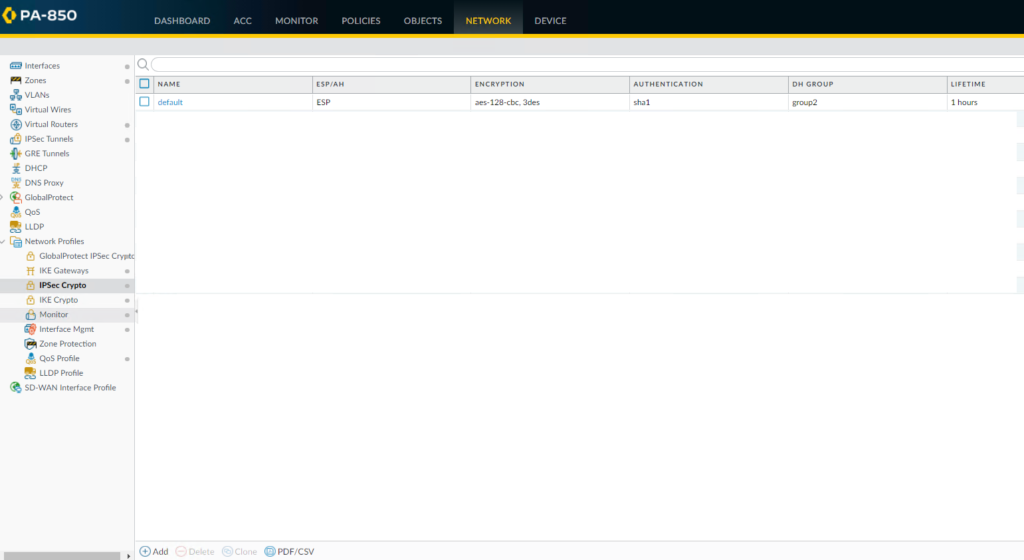
•Configure the IPSec Crypto profile to specify protocols and algorithms for identification, authentication, and encryption in VPN tunnels based on IPSec SA negotiation (IKEv1 Phase-2), which should match AWS configuration
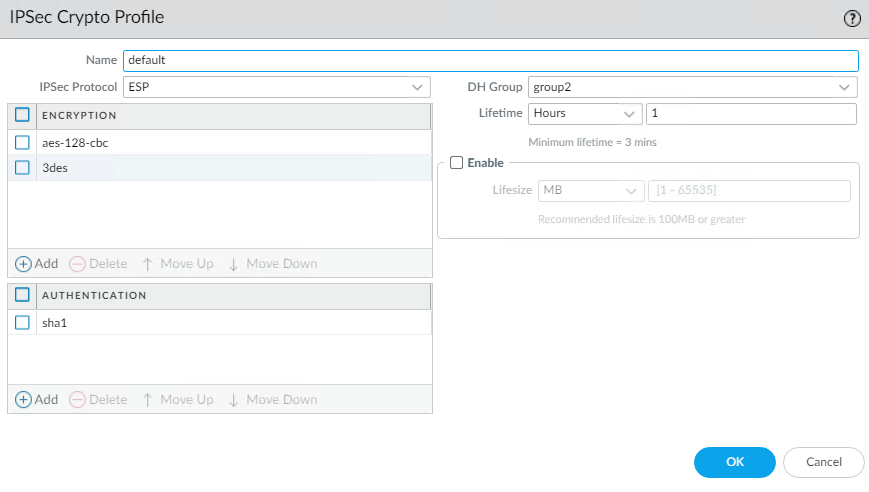
* IPSec Crypto Profile looks like this
Step 5: Configure IPSec Tunnel
AWS Configuration
set zone untrust network layer3 tunnel.1
On PA-850
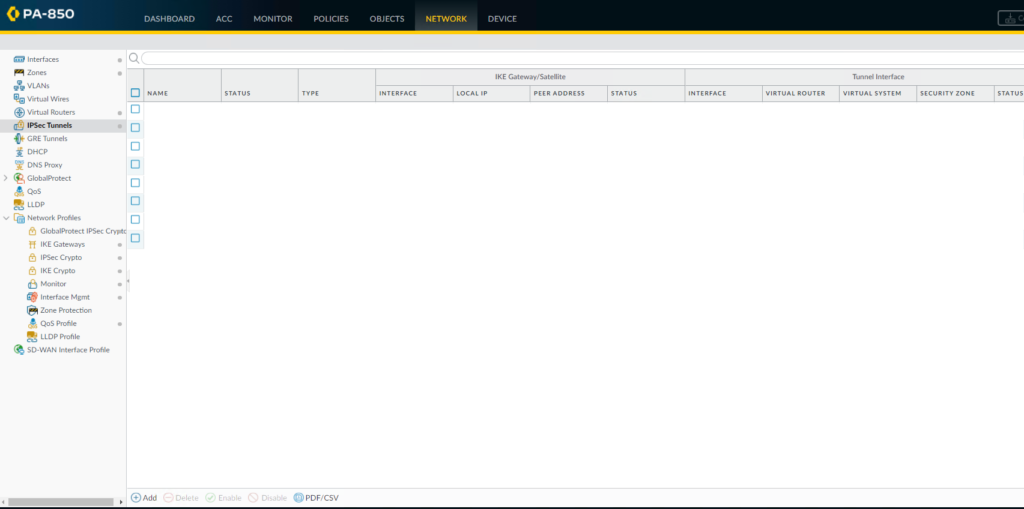
•Go to Network>IPSec Tunnels.
•Click Add to create a new IPSec Tunnel.
* In the General window select the Tunnel Interface, the IKE Gateway and IPSec Crypto Profile you just created above to set up the parameters to establish IPSec VPN tunnels between firewalls.
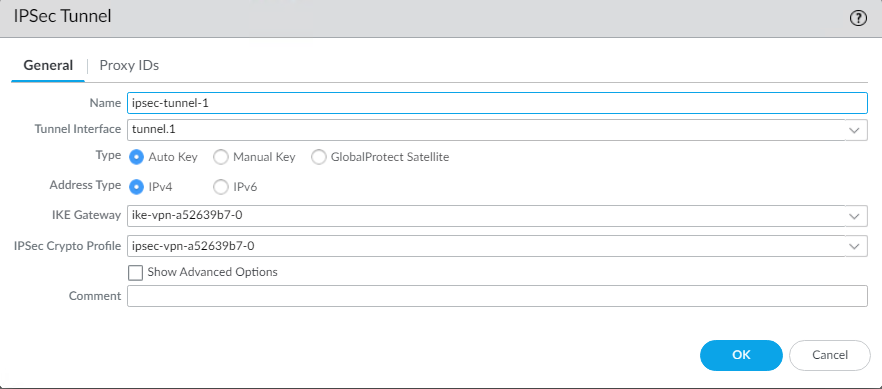
* IPSec Tunnel configuration looks like this

Step 6: Configure Virtual Router
AWS Configuration
set network virtual-router default interface tunnel.1
edit network tunnel ipsec ipsec-tunnel-1
set auto-key ipsec-crypto-profile ipsec-vpn-xxxx-0
set auto-key ike-gateway ike-vpn-xxxx-0
set tunnel-interface tunnel.1
set anti-replay yes
On PA-850
* Go to Network>Virtual Routers.
* Click on your Virtual router profile, default in our example.
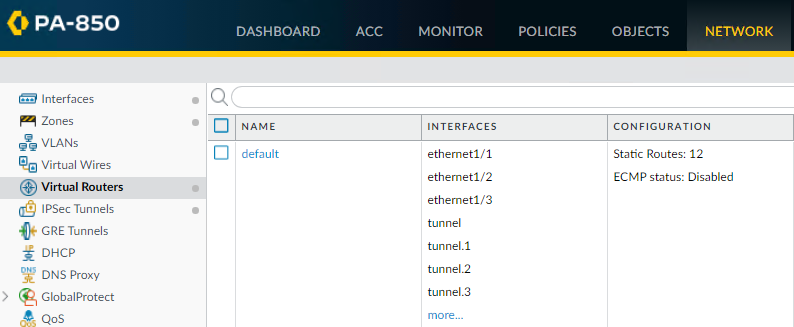
* Click Static Routes and then Add to add a new route for the network that is behind the other VPN endpoint
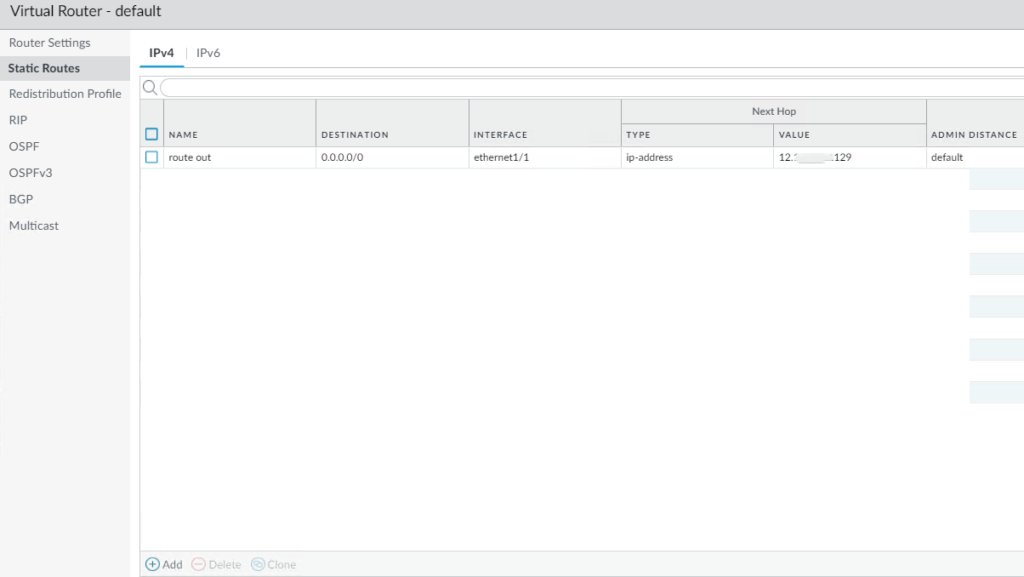
•Be sure to use the proper Tunnel Interface.
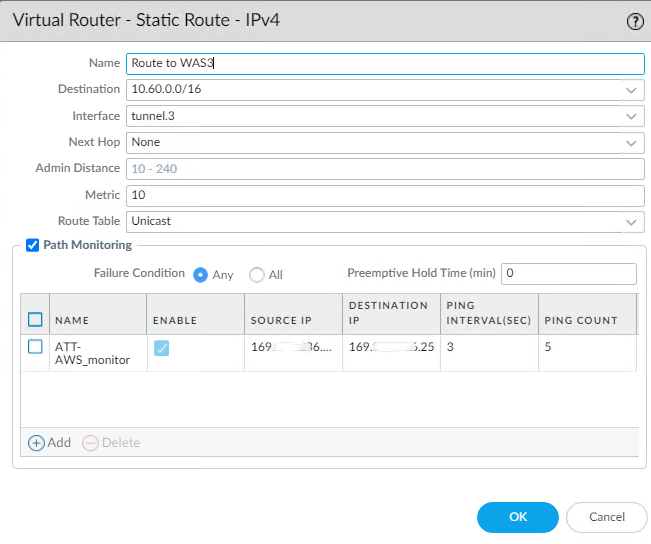
•Virtual Router configuration looks like this

Step 7: configure Security and Policy Rules
AWS Configuration
edit rulebase pbf rules pbf-vpn-vpn-xxxx-0
set action forward nexthop ip-address 169.x.x.25
set action forward egress-interface tunnel.1
set action forward monitor profile tunnelmonitor disable-if-unreachable yes ip-address 169.x.x.25
set source LAN-CIDR source-user any destination VPC-CIDR application any service any
set from zone trust
set disabled no
On PA-850
* By default the ike negotiation and ipsec/esp packets would be allowed via the intrazone default allow.
If you wish to have more granular control, you could specifically allow the required traffic and deny the rest.
Step 8: Commit the configuration and test
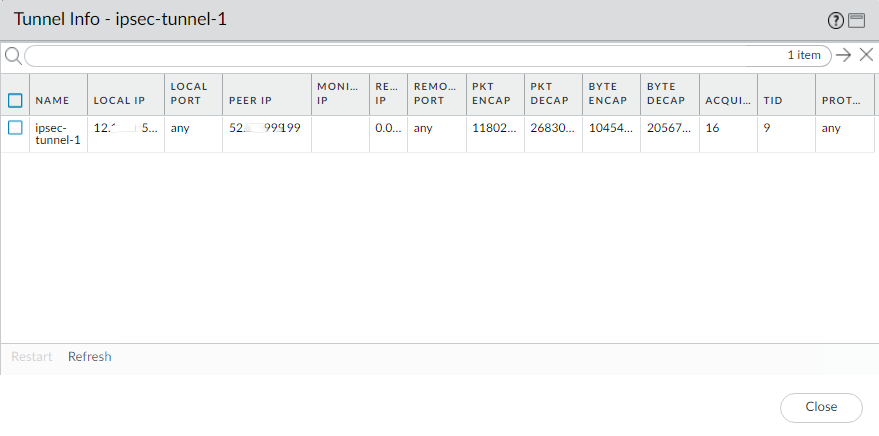
To check the IPSec Status, go to Network>IPSec Tunnels
Or ping other side IP address for example ping 10.60.3.12
And check the Monitor
Please view this step by step video: