Situation: After registering a Paloalto Firewall on PA support website, you will have an option to generate ay 1 Configuration. Here is how.
- Login Support.paloaltonetworks.com.
- Register the device.
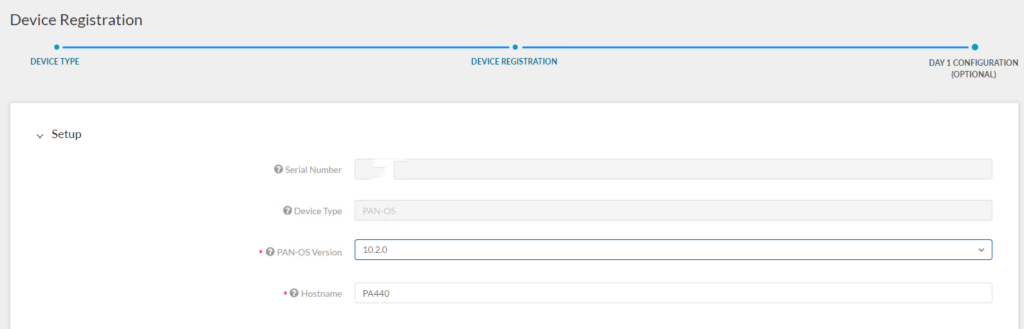
- Click on DAY 1 CONFIGURATION
4. Enter all information you want to configure your firewall. Here are the example.
PAN-OS Version: 10.2.0
Hostname: PA440
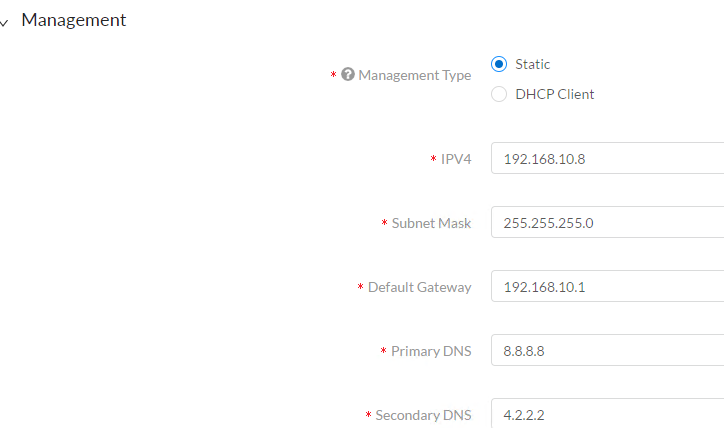
Management Type: Static
IPV4: 192.168.10.8
Subnet Mask: 255.255.255.0
Default Gateway: 192.168.10.1
Primary DNS: 8.8.8.8
Secondary DNS: 4.2.2.2
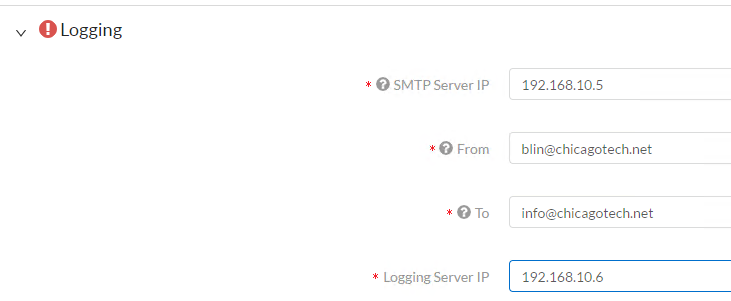
Logging
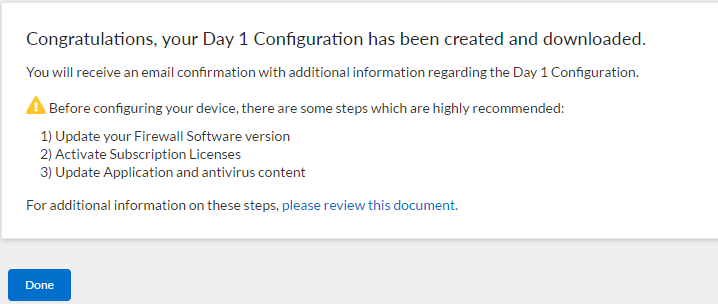
5. Click on Generate Config File.
6. Palo Alto Networks will send the email with the configuration to you soon.