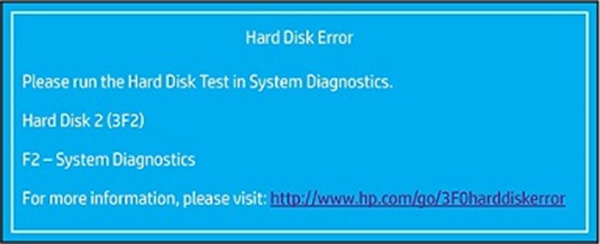
If the Hard Disk Error 3F0 boot device not found is displayed on a black screen, use the following procedures to try to resolve the error.
Resolution 1: Perform Hard Reset
- Turn off your PC and remove the AC adapter from it.
- Make sure there is no peripheral device connected now to your PC.
- After that, press the Power button for about 15 seconds to drain out the residual charge.
- Now, press the Power button again to reboot your system.
- Once the Startup menu appears, use arrow keys to navigate to Start Windows Normally and hit Enter.
- Connect all the needed devices and see if the error is resolved.
Resolution 2: Reset Your Hard Drive
You can try resetting the hard drive to fix the error. To do so, follow the given steps:
- Turn off your PC by pressing the Power button and unplug the power cable.
- Now, disconnect the hard drive and reconnect again.
- Reboot your PC to check if it works seamlessly without showing any error.
Resolution 3: Restore BIOS default settings
- Turn off the computer and wait five seconds.
- Press the power button to start the computer and repeatedly press the f10 key to enter the BIOS setup menu.
- On the BIOS Setup screen, press f9 to select and load the BIOS Setup Default settings.
- Press f10 to Save and Exit.
- Use the arrow keys to select Yes, and then press Enter when asked Exit Saving Changes?
- Follow the prompts to restart your computer.
Resolution 4: Boot PC with Bootable Media and Rebuild MBR
If you’re having trouble booting your PC normally, boot your PC with bootable media and then rebuild the MBR (Master Boot Record). Here are the steps:
- Create installation media for Windows and boot your PC using the media.
- Next, select the language and other preferences and click ‘Next on the initial setup screen.
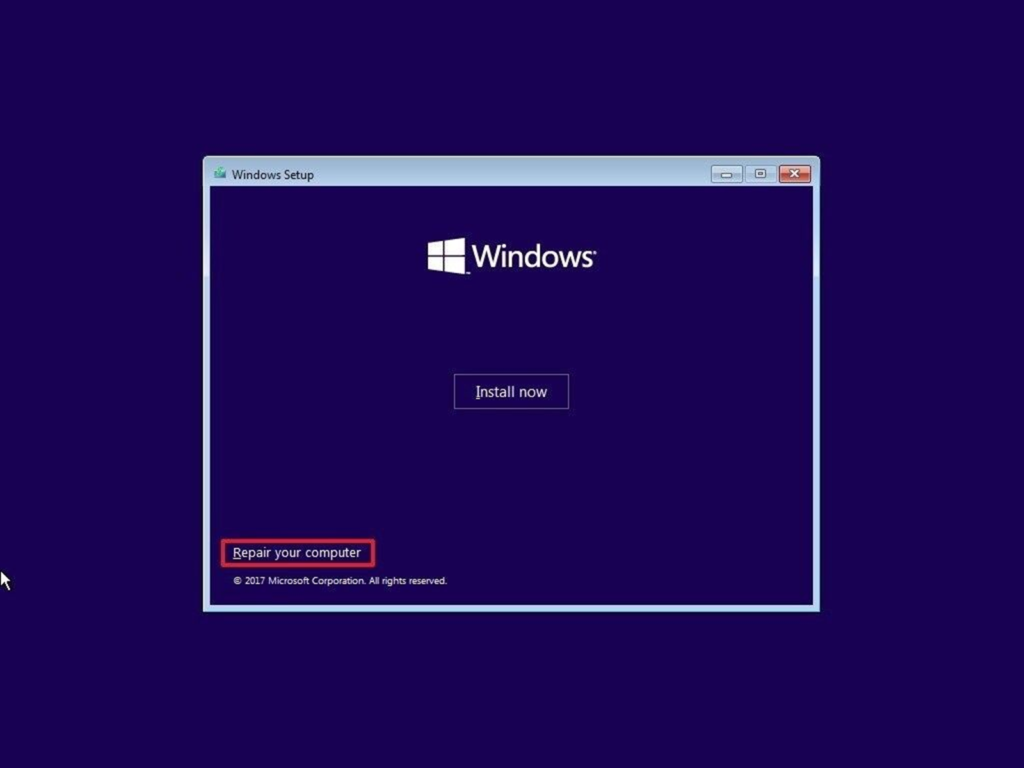
- Next, click Repair your computer.
- On Automatic Repair environment, click Advanced options.
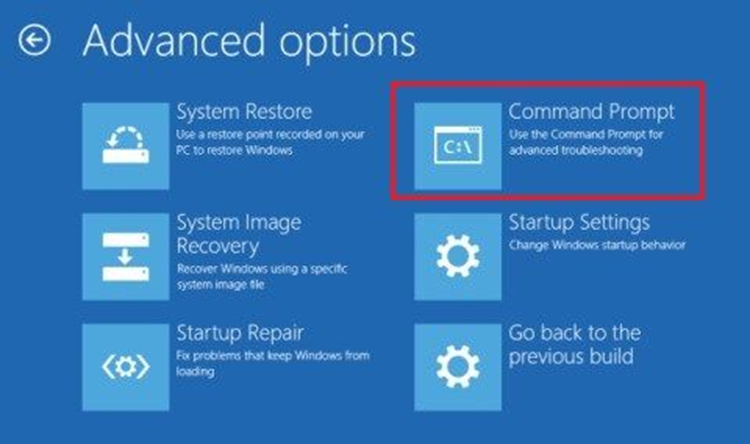
- Then follow Troubleshoot > Advanced options > Command Prompt.
- In the Command Prompt window, type the following commands and press Enter.
BOOTREC /FIXMBR
BOOTREC /FIXBOOT
BOOTREC /rebuildbcd
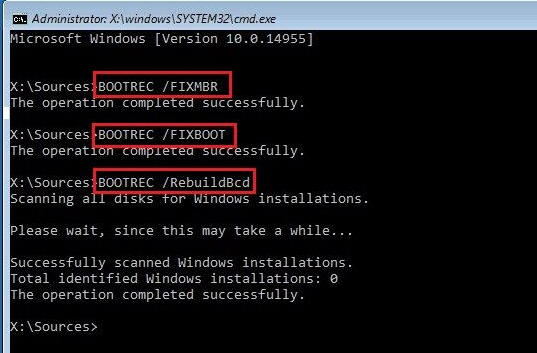
- Once the process is complete, close the window.
- Reboot your system and check if it’s working fine.
Resolution 5: Reset your PC
If none of the above methods work, you’ll be left with only one option – resetting your PC. To do so, restart your PC with bootable installation media and follow the given steps:
- Enter Automatic Repair environment and click Advanced options.
- On the Choose an Option screen, click Troubleshoot.
- Next, click Reset this PC.

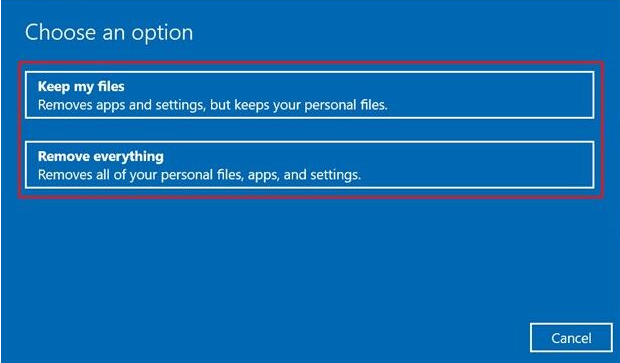
- Now, choose an option – Keep my files or Remove everything.
Note: To make this method work, it is recommended to choose Remove everything.
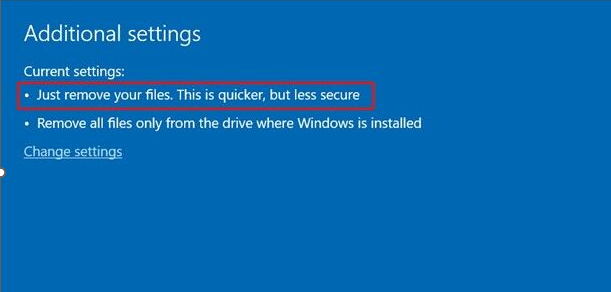
On the next prompt, click Just remove your files and then click Next.
A warning message will appear. Click Next > Reset.
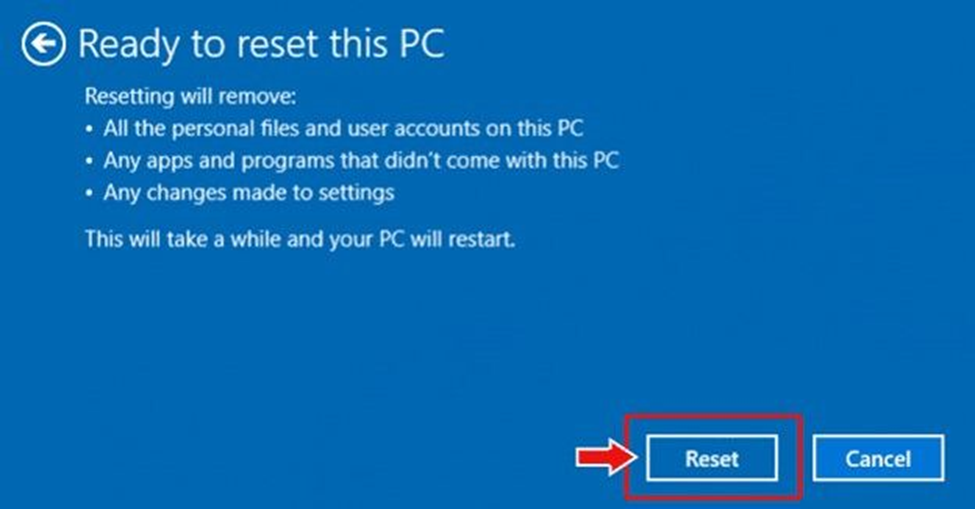
- When prompted, click Continue.
- Once the process is finished, close the window and reboot your system.
Resetting your PC with the ‘Remove everything’ option will cause data loss. However, you can use a powerful data recovery software, such as Stellar Data Recovery Professional to recover the data after resetting your Windows PC. It is a DIY tool that efficiently restores any data from all types of storage devices.
Resolution 6: Run CHKDSK Command to Fix Bad Sectors on Hard Drive
Bad sectors on the hard drive may occur due to corruption, physical damage to the drive, etc. You can try running the CHKDSK command to fix the corruption and bad sectors on the hard drive. Follow the given steps:
- Type Command Prompt in Windows Search Box and run it as an administrator.
- In the Command Prompt Window, type CHKDSK /f/r/D: and press Enter. (Replace D: with your hard drive letter.
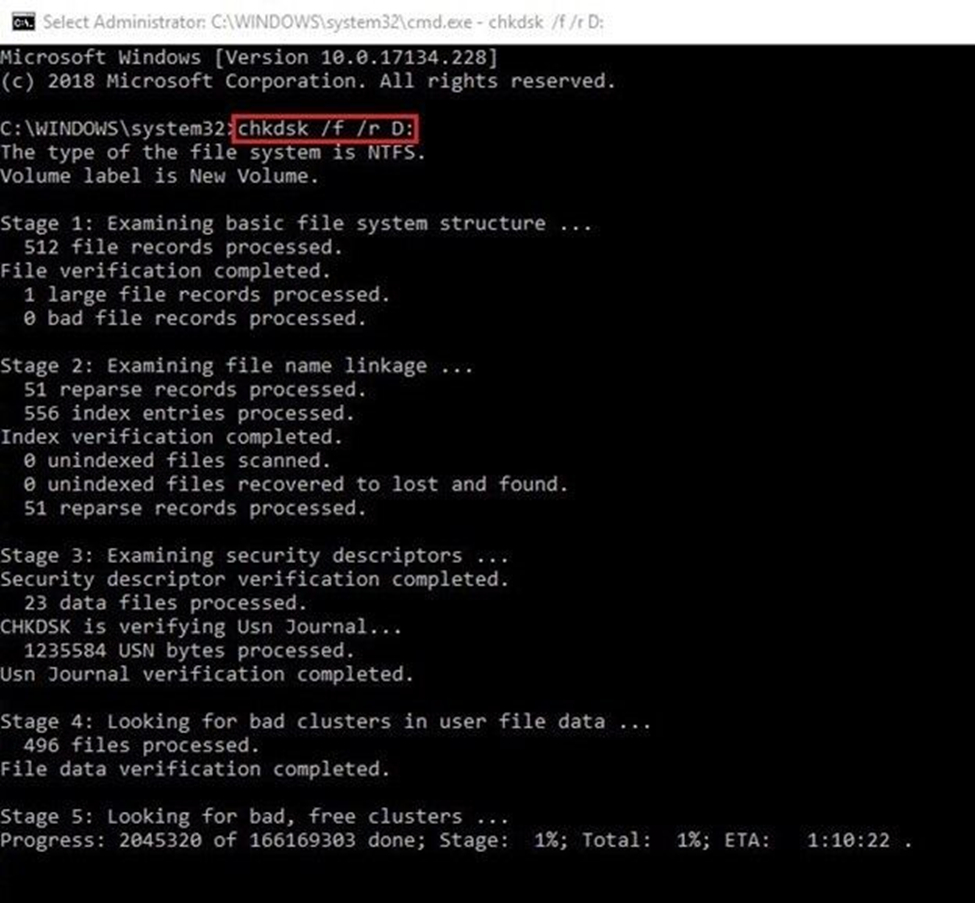
- Wait for a while. Once done, close the Command Prompt window and check if the problem is solved.
Caution: The CHKDSK command with the F and R attribute can fix the corrupted hard drive. However, this command scans and marks down the bad sectors on the hard drive and prevents Windows from reading and storing data on these bad sectors, eventually causing data loss.
Resolution 7: Perform the hard drive symptom test in HP PC Hardware Diagnostics UEFI
When Windows won’t start, use the following instructions to open the Symptom Tests menu, and then run the hard drive test.
- Hold the power button for at least five seconds to turn off the computer.
- Turn on the computer and immediately press esc repeatedly, about once every second. When the menu is displayed, press the f2 key.
- On the main menu, click Symptom Tests.
The Symptom Tests menu is displayed.
Your Symptom Tests menu might be different, depending on the components installed on your computer.
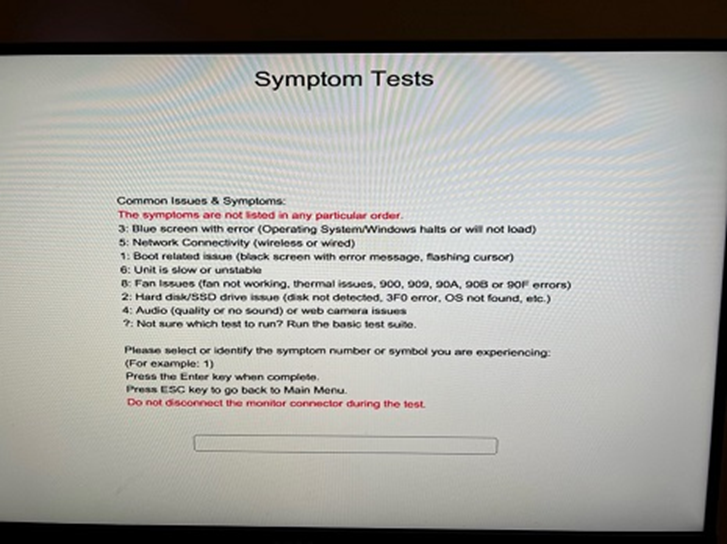
- Select Hard disk/SSD drive issue, and then press enter.
- If the computer has more than one hard drive, select the drive to test. To test all the hard drives, select Test All Hard Drives.
NOTE:
If the test does not find a hard drive, try reinstalling Windows using the steps in Reinstall Windows on the hard drive.
When the test is complete, the screen displays the results. Test results are also available in the Test Logs on the main menu.
- If the hard drive passes the Quick Test, but there is still a problem with the hard drive, run the Extensive Test. This test includes the SMART Check, Short DST, Optimized DST, and Long DST. To run these tests individually, select them from the Hard Drive Tests menu.
- If the hard drive fails a test, click Troubleshoot.
- Follow the on-screen instructions to attempt to resolve the problem, and then click Yes.
- If the problem is not resolved, click Yes to contact HP Customer Support.
- Write down or copy the failure ID (24-digit code) and product ID for when you contact HP Customer Support. You can also use your mobile device to take a photo of this information or to scan the displayed QR code. The information is also available in Test Logs on the main menu.
- If your computer is online, click NEXT to go to the HP Customer Support website.
Resolution 8: Update the BIOS, please follow the manufactory instructions.
Please view this step by step video: