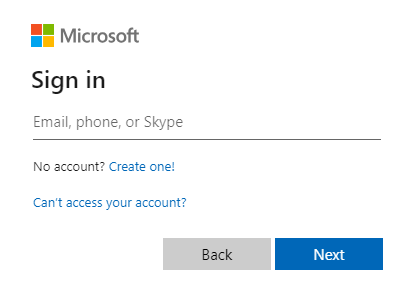
- Login SharePoint.
- Go to the site you want to share.
- Click Copy Link.

4. Click the Settings in the popup
5. Check Anyone and then Apply.
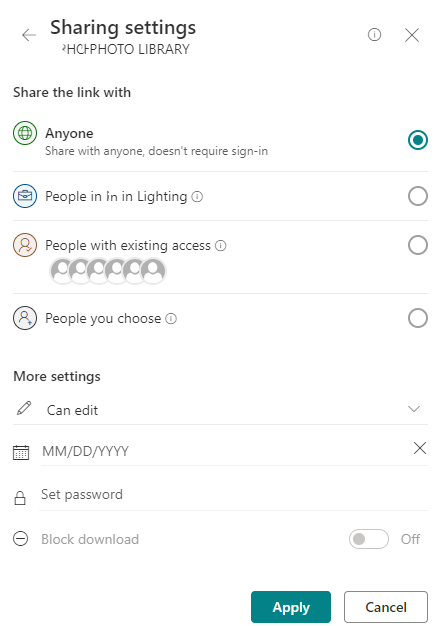
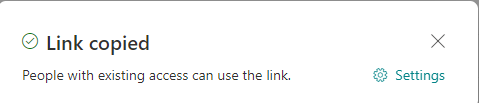
6. Now, the Anyone with the link can edit is copied and you can send the like your client.

4. Click the Settings in the popup
5. Check Anyone and then Apply.
6. Now, the Anyone with the link can edit is copied and you can send the like your client.

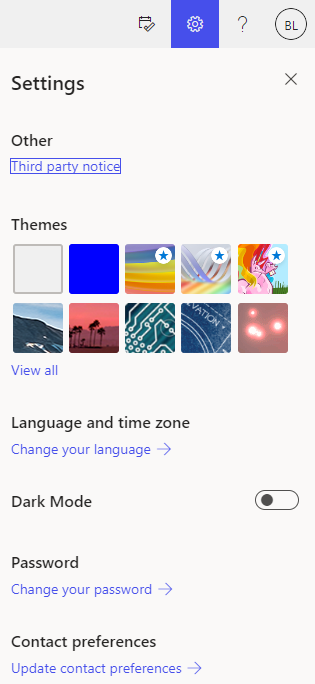
2. Click on Settings.
3. Click on Profiles.

4. Click on Passwords.
5. Scroll down to the Saved passwords section.
6. Select the logins and passwords you want to remove with checkboxes.
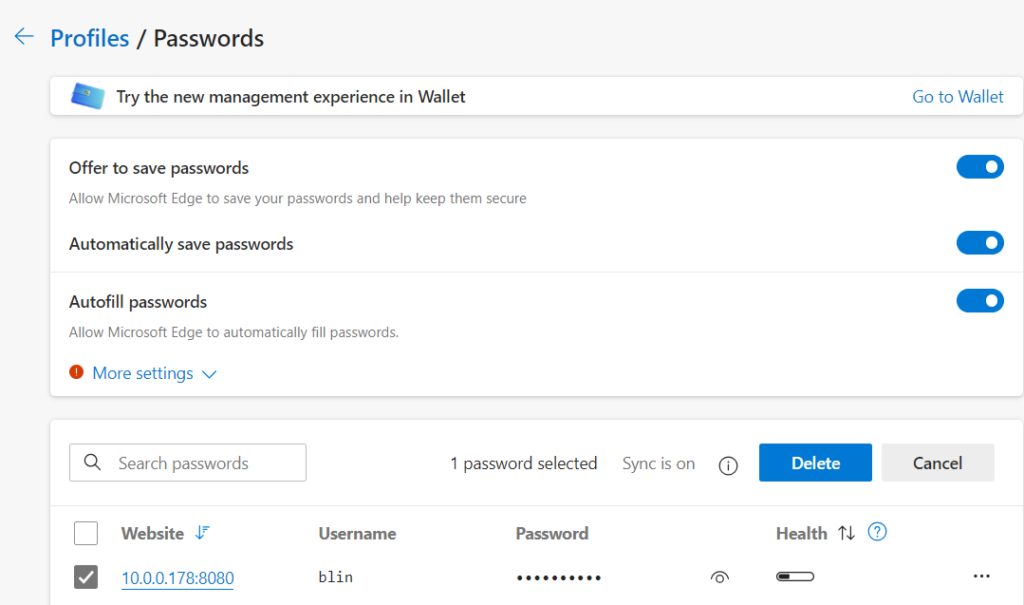
7. Click on the three dots next to the password and then click the Delete option.
2. Go to Settings > Password.
3. Enter your old password.
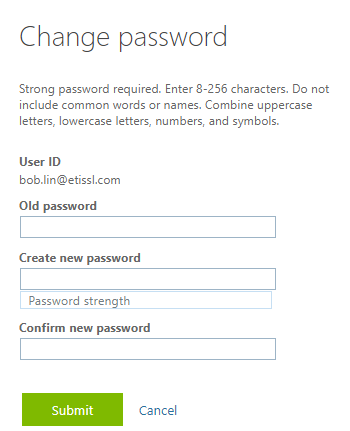
4. Create a new password and confirm it.
. Select Submit to finish and change your password.
3. Click the Disabled slider. The slider is green to indicated that RPF is enabled.

4. Click Save. RPF is now enabled for the account.
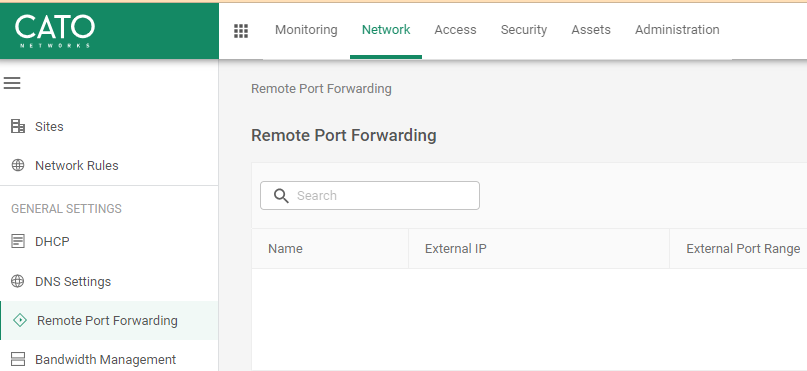
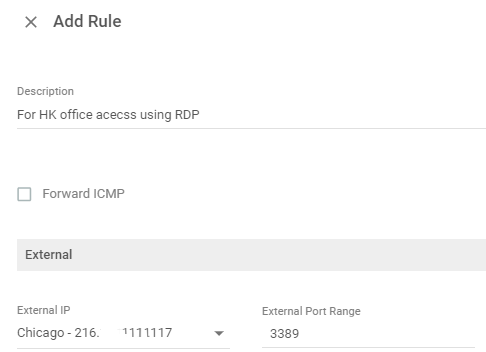
3. Enter the Name for the rule.
(Optional) Select Forward ICMP to enable forwarding ICMP messages for this rule.
4. In the External section, define the Cato allocated External IP and External Port Range for the ports monitored by the PoP.
5. In the Internal section, enter the Internal IP address to which the traffic is forwarded and the Internal Port range.
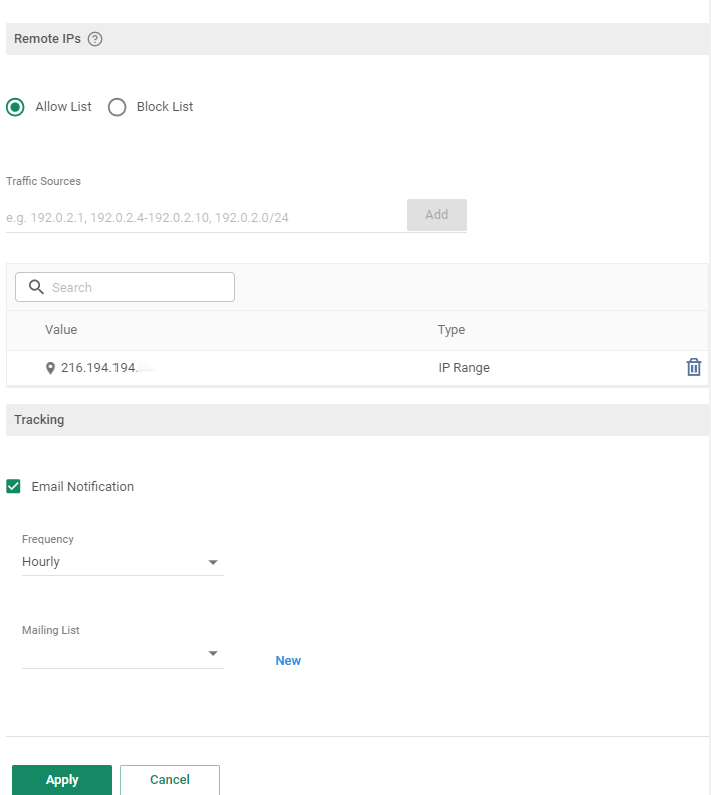
6. In the Remote IPs section, select if this rule is an Allow List or Block List.
To define the only traffic that is ALLOWED to connect to the host:
Select Allow List.
Select the Traffic Sources based on the IP or Subnet. These are the IP addresses and ranges that are allowed to perform RPF to the host.
Click (Add) to add more allowed remote IPs.
To allow all traffic to this host, and define sources that are BLOCKED and can’t connect to it:
Select Block List.
Select the Traffic Sources based on the IP or Subnet. These are the IP addresses and ranges that are blocked and can’t perform RPF to the host.
Click (Add) to add more blocked remote IPs.
(Optional) Define email notifications, for the traffic that matches the rule. For more information, see Working with Email Notifications for the Account.
Click Apply. The rule is added.
Click Save. The RPF rule is added to your account.

Migrating Microsoft tenants can be a complex process, and several common problems and challenges can arise during such migrations. Here is a summary of some key issues and considerations:
Possible resolutions;
 and go to the team in your team list.
 > Add member.
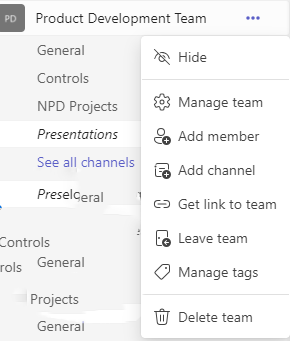
3. Enter the guest’s email address. Anyone with a business or consumer email account, such as Outlook, Gmail, or others, can join your team as a guest.
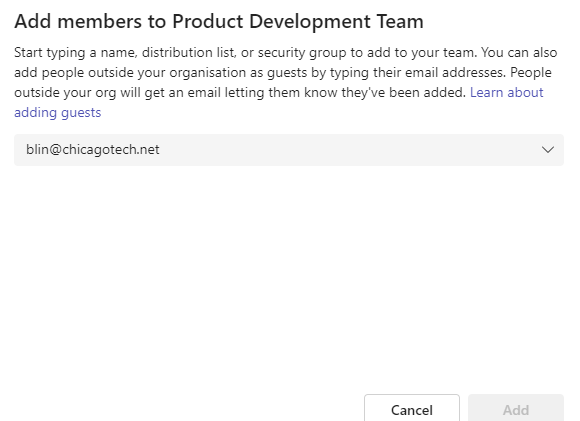
Note: If you receive a “We didn’t find any matches” error while trying to add a guest, your organization doesn’t allow guests.
4. Add your guest’s name. Select Edit guest information  and type a friendly name for them. Be sure to take the time to do this now—you’ll need the help of an IT admin to do it later.
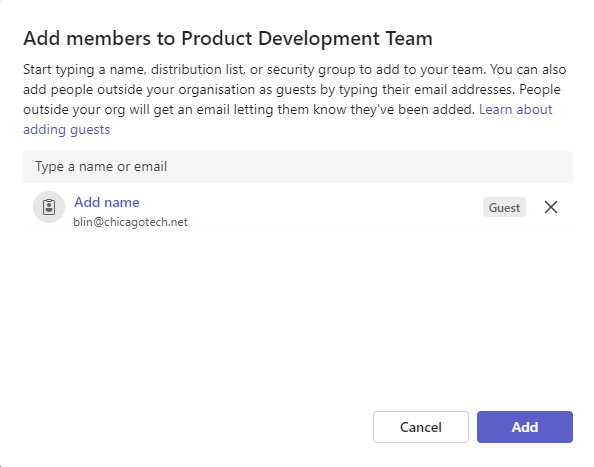
5. Select Add. Guests will receive a welcome email invitation that includes some information about joining Teams
Alternatively, you may add the guest email to Contacts.
If you’re experiencing this issue, it could be due to a few reasons:
To fix it,
you can try the following steps to resolve the problem:

3. Click on Users Directory and then New.
4. Enter the user name and email address.
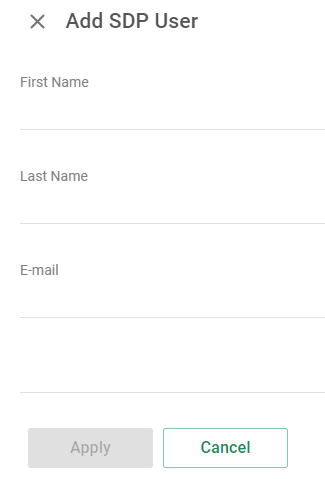
5. Click Apply to finish.
Please follow this instruction to install Cato VPN client.
While you can individually clear or remove credentials, you can create this batch file sourced from Github and run it to clear all credentials from Credential Manager. Here’s how:
@echo off
cmdkey.exe /list > "%TEMP%\List.txt"
findstr.exe Target "%TEMP%\List.txt" > "%TEMP%\tokensonly.txt"
FOR /F "tokens=1,2 delims= " %%G IN (%TEMP%\tokensonly.txt) DO cmdkey.exe /delete:%%H
del "%TEMP%\List.txt" /s /f /q
del "%TEMP%\tokensonly.txt" /s /f /q
echo All done
pause
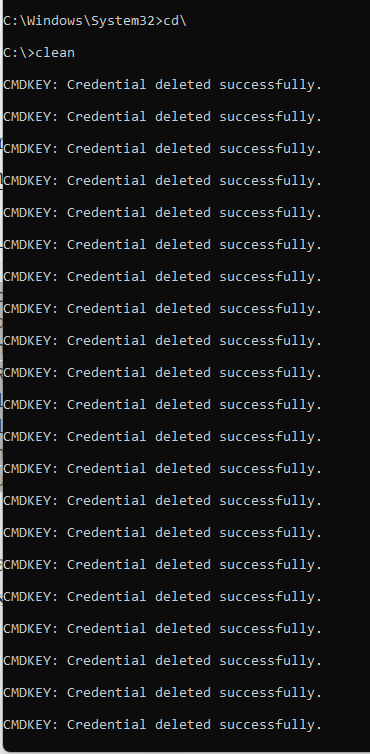
To clear all credentials, simply run the batch file with admin privilege (right-click the saved file and select Run as Administrator from the context menu).
You can also schedule the batch file to run automatically in Windows 11/10 if you want.
You can use scripting or command-line tools to automate the removal of credentials. One way to do this is by using the cmdkey command in Command Prompt or PowerShell. Here’s how you can do it:
Win + X and select “Windows Terminal (Admin)” or “Command Prompt (Admin)” if you’re using Windows 10 or earlier.cmdkey command to list and remove credentials. For example, to list all stored credentials, you can run:batchCopy codecmdkey /list To remove a specific credential, you can use:batchCopy codecmdkey /delete:TargetName Replace TargetName with the name of the credential you want to remove.Get-WmiObject -Class Win32_NetworkAdapterConfiguration | ForEach-Object { cmdkey /delete:$($_.Description) } Save the script as a .ps1 file and execute it with administrative privileges in PowerShell.