Import Users from CSV on DUO

To add users to Duo Admin Panel, you can use Duo’s Import Users tool imports user information from a properly formatted comma-separated values (CSV) file. CSV import values can include username aliases, email addresses, full names, groups, notes, and multiple phones or mobile devices. Duo’s Import Users tool differs from the Bulk Enroll Users tool, in that those entries are initially limited to username and email address, and those users cannot be managed in Duo until they’ve completed self-enrollment.

The CSV file can include multiple data fields for each Duo user.

Allowed Fields

The fields allowed in this CSV file are:

  • username
  • realname
  • alias[1…8]
  • email
  • phone[1…n]
  • platform[1…n]
  • group[1…n]
  • status
  • notes
  • token[1…n]
  • type[1…n]

Only the username field is mandatory; all other fields are optional, and can be arranged in any order (as shown in the CSV File Format section below). Duo usernames and username aliases should have unique values for each user.

CSV File Format

The first line of the CSV file (the header) specifies the fields to import. For example:

username,realname,alias1,email,status,phone1,platform1,phone2,group1,group2

Here are some examples of possible user entries in a CSV file using the example header. Notice that when there is no value for a field, the field is left blank.

username,realname,alias1,alias2,email,status,phone1,platform1,phone2,platform2,group1,group2,notes,token1,type1 jason,Jason Liu,jason@example.com,smithj3,jason@example.com,active,734-555-1234,iphone,734-555-3232,mobile,StdUsers,,,, sally,Sally Jones,sally@example.com,joness5,sally@example.com,disabled,(734)-555-1235,android,(734)-555-4343,landline,StdUsers,,activate account after Dec 4,, jack,Jack Cruz,jack@example.com,,jack@example.com,bypass,+17345554322,smartphone,,,StdUsers,NetAdmins,,101222,h6 sarah,Sarah James,sarah@example.com,,sarah@example.com,active,(734) 555-2235,iphone,(734) 555-3302 x3243,landline,StdUsers,,,, bob,Bob Rogers,bob@example.com,rogersb,bob@example.com,active,734 555 3444,landline,734 223 9836,smartphone,StdUsers,,,, mary,,,,,delete,,,,,,,,,

Here is the step by step how to importing Users

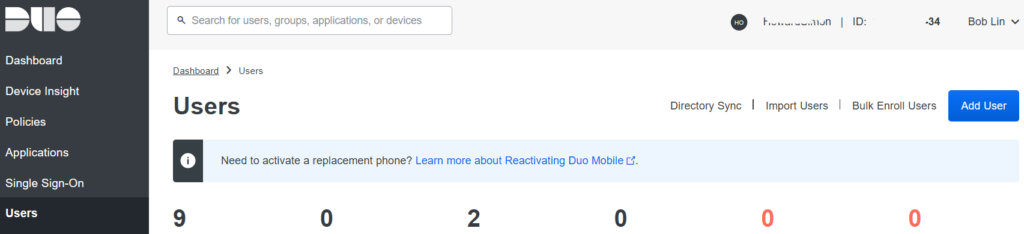
  1. Log in to the Duo Admin Panel and click Users in the left sidebar. Click the Import Users 

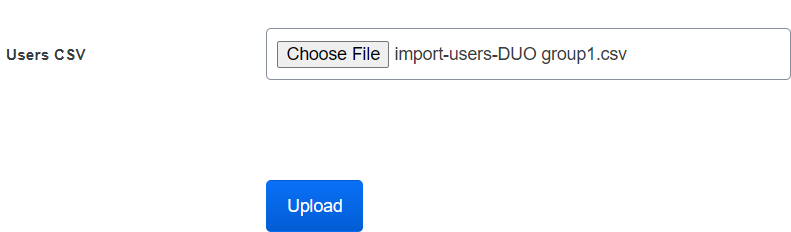
2. Click the Choose File button, browse to your CSV file.

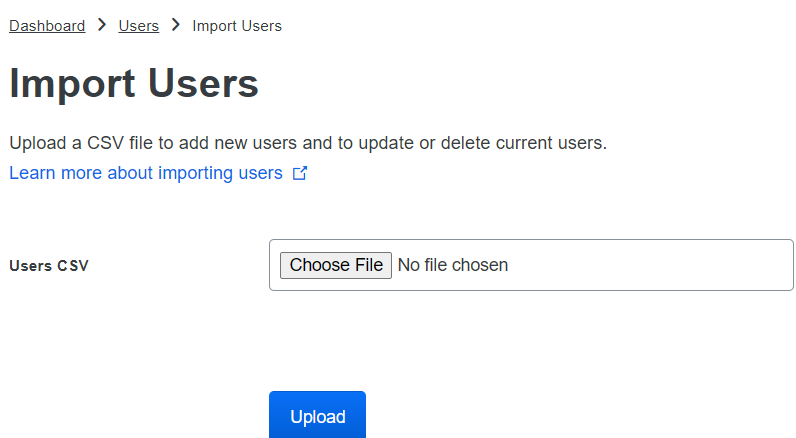
3. Click Upload to start the import process.

If the CSV file contains any errors, the import attempt fails and you are shown a red error message like the one below. If you see an error message, then the attempt has failed and none of your users were imported. Correct the indicated errors and try the import again.

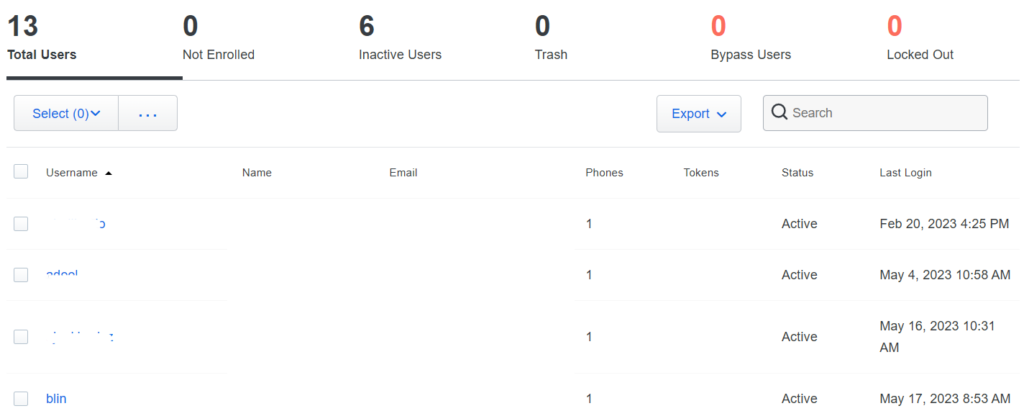
4. After the CSV import is finished, a success message at the top of the Duo Admin Panel reports the results:

5. You should those usess.

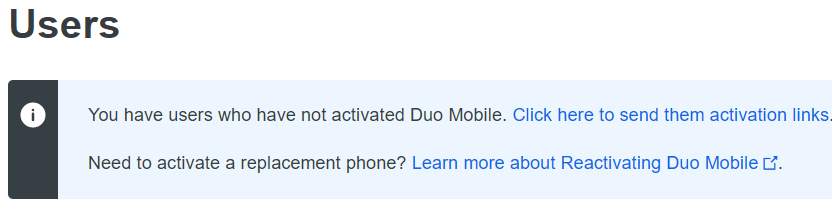
6. Now, you need to send the new users an activation link.

How to Schedule a meeting in Teams

When you schedule a meeting in Outlook, it’ll show up in Teams, and vice versa. Note: Up to 1,000 invitees can join a Teams meeting and interact by using chat, audio, and video.

Schedule a meeting

There are several ways to schedule a meeting in Teams:

  • Select Schedule a meeting Schedule a meeting button 
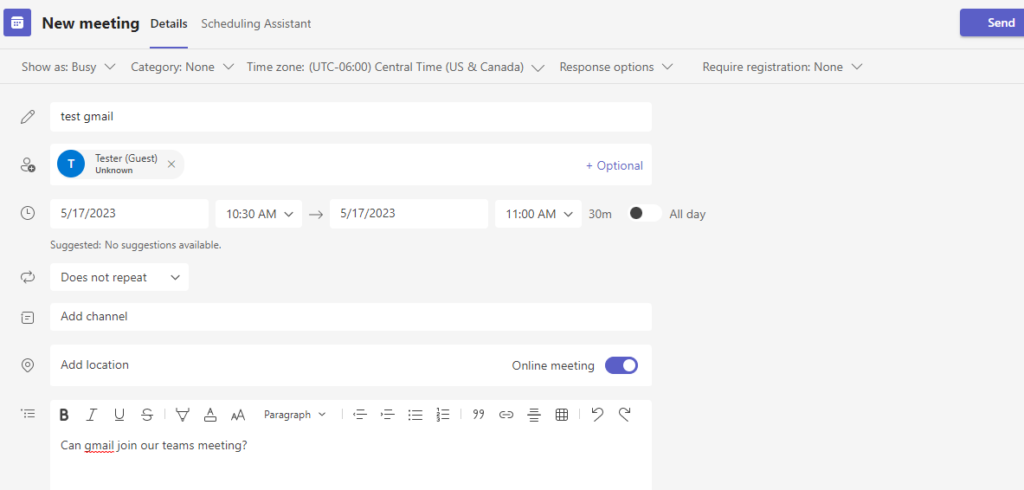
in a one-on-one or a group chat (below the box where you type a new message) to book a meeting with the people in the chat. You can’t schedule a meeting from a meeting chat.
  • Go to Calendar Meetings button on the left side of the app and select New meeting in the top right corner.
  • Select a range of time in the calendar. A scheduling form will pop open.

Here is how to use Calendar Meetings button to schedule a meeting.

  1. Click on Calendar Meetings button on the left side of the app and select New meeting in the top right corner.

2. The scheduling form is where you’ll give your meeting a title, invite people, and add meeting details. Use the Scheduling Assistant to find a time that works for everyone.

3. The Teams’ meeting has been added to the Calendars.

How to invite people who are not from the organization to Teams meetings

If you need to invite by e-mail that these people are not from the organization,
Please follow on the steps below..

  1. Select Schedule a meeting Schedule a meeting button in a chat (below the box where you type a new message) to book a meeting with the people in the chat.

Go to Calendar Meetings button on the left side of the app and select New meeting in the top right corner.

Select a range of time in the calendar. A scheduling form will pop open.

The scheduling form is where you’ll give your meeting a title, invite people, and add meeting details. Use the Scheduling Assistant to find a time that works for everyone.

Teams lets you invite people outside your organization, including those who don’t have a Teams license. You’ll need their full email address to invite them.

Go to where it says Add required attendees. If anyone is an optional attendee, select Optional instead.

Type the person’s full email address (ex: *** Email address is removed for privacy ***).

Select Invite. They’ll receive an email with a link to the meeting.

https://support.microsoft.com/en-us/office/sche…

How to Sync Android Galley with OneDrive

To begin using OneDrive to sync your photos, you may need to download the Microsoft OneDrive app on your device and add your Microsoft account. Here is how.

  1. Open the Gallery app, and then Tap Gallery Settings

2. Turn on “Sync with OneDrive”.

3. If you’ve signed in to your Microsoft account, but it hasn’t been linked to your Samsung account, the option will be Cloud sync. If you aren’t signed in to a Microsoft account or haven’t connected it yet, you will be prompted to do so.

4. Follow any on-screen instructions.

5. After login, tap Done.

6. Login your OneDrive account, you should see the pictures synced from the phone on the folder Pictures>Gallery (Samsung Gallery in our example).

Create a Policy to allow accessing Dropbox on PA Firewall

by default, Palo alto firewall blocks downloading files from Dropbox. If your users need to download files from Dropbox, you may want to create a policy rule. Here is how.

  1. Login PA Firewall.
  2. Go to POLICIES>Security.
  3. Click Add.
  4. in General, enter the Name, Rule type, Description, Tags, group Rules by Tage.

5. In Source, select trust in SORSE ZONE

6. In Destination, select untrust in DESTINATION ZONE

7. In Application, Add dropbox in APPLICATIONS.

8. in Actions, select Allow in Action, configure Profile as show below as example.

9. Click OK to save the settings, and then Commit.

How to configure appellation starts as windows service automatically?

To configure an application to start as a Windows service automatically, you can follow these steps:

  1. Open the Command Prompt as an administrator.
  2. Navigate to the directory where the executable file of the application is located.
  3. Run the following command:
luaCopy codesc create ServiceName binPath= "C:\Path\To\Executable.exe"

Replace “ServiceName” with the name you want to give to the service and “C:\Path\To\Executable.exe” with the path to the executable file of your application.

  1. Once the service is created, you can start it with the following command:
sqlCopy codesc start ServiceName

Replace “ServiceName” with the name you gave to the service.

  1. To ensure that the service starts automatically when the computer starts, you can run the following command:
arduinoCopy codesc config ServiceName start= auto

This sets the startup type of the service to automatic.

Note: If you want to delete the service, you can run the following command:

arduinoCopy codesc delete ServiceName

Replace “ServiceName” with the name of the service you want to delete.

Or

Control whether an app can run in the background

  1. Select Start , then select Settings  > Apps > Apps & features.
  2. Scroll to the desired app, select More options on the right edge of the window, then select Advanced options.
  3. In the Background apps permissions section, under Let this app run in the background, select one of the following options:
    • Always—The app runs in the background, receiving info, sending notifications, and staying up-to-date even when you’re not actively using it. This option may use more power.
    • Power optimized—Windows decides what will save the most power while still allowing the app to receive notifications and update periodically. This option may limit an app that uses a lot of power.

How to Test the Authentication Configuration in Palo Alto Firewall

Use this command:

test authentication authentication-profile <authentication-profile-name> username <username> password

If the authentication profile has space, you may use quotation, For example, 

test authentication authentication-profile "DUO Authentication" username blin password

Above is for IP 10.0.0.119. Below is for IP 10.0.0.183.

How to configure 2 Duo proxies

To configure two Duo proxies, follow these steps:

  1. Install the Duo Proxy software: Install the Duo Proxy software on two separate servers. The installation instructions can be found on the Duo Security website.
  2. Configure the first Duo Proxy: Open the Duo configuration file on the first server and configure it with the appropriate settings, including the API hostname, integration key, and secret key provided by Duo. Also, configure the appropriate settings for your authentication sources, such as Active Directory or LDAP.
  3. Configure the second Duo Proxy: Open the Duo configuration file on the second server and configure it with the same settings as the first Duo Proxy.
  4. Configure the load balancer: Set up a load balancer to distribute traffic between the two Duo Proxy servers. Configure the load balancer to use a health check to ensure that each Duo Proxy server is healthy and able to process authentication requests.
  5. Test the configuration: Test the configuration by attempting to log in to a service that is protected by Duo. Verify that the load balancer distributes traffic evenly between the two Duo Proxy servers.

That’s it! You have successfully configured two Duo proxies to provide redundancy and load balancing for your authentication traffic.

How to configure MFA using DUO for palo alto firewall?

To configure Multi-Factor Authentication (MFA) using DUO for Palo Alto firewall, follow these steps:

  1. Sign up for a DUO account: Go to the DUO Security website and sign up for an account. After creating your account, navigate to the DUO Admin Panel.
  2. Add Palo Alto Networks as an application: In the DUO Admin Panel, go to Applications > Protect an Application > Palo Alto Networks. Then, select the type of Palo Alto Networks application you are using, such as GlobalProtect or Panorama.
  3. Configure Palo Alto Networks in DUO: In the DUO Admin Panel, go to Palo Alto Networks > Configuration. Enter the API hostname, integration key, and secret key provided by DUO.
  4. Configure Palo Alto Networks for MFA: In the Palo Alto Networks web interface, go to Device > Authentication Profile > DUO. Enter the same API hostname, integration key, and secret key provided by DUO.
  5. Enable MFA for Palo Alto Networks: In the Palo Alto Networks web interface, go to Device > Multi-Factor Authentication. Enable the checkbox for DUO.
  6. Test the MFA configuration: Try logging into Palo Alto Networks and verify that you are prompted for MFA authentication.

That’s it! You have successfully configured MFA using DUO for your Palo Alto firewall.

How to configure Palo Alto Firewall to intergrade with the second DUO Proxy server for redundancy

Situation: The client has been using DUO for Palo Alto firewall MFA. They would like to add the secondary DUO Proxy server for the redundancy. However, they can’t find any article on PA support.

Suggestion:

  1. Create two MFA server profiles
  2. Go to the Authentication profile > select the profile > Go to the factors > add that two MFA profiles and test. (Check on the DUO server which profile is hitting)
  3. Change the priority of the MFA server profile (In the factors tab) and test. (Check on the DUO server which profile is hitting)