|
How to grant the Send As permissions for one
account in Exchange
1. Start the Active Directory Users and Computers management console.
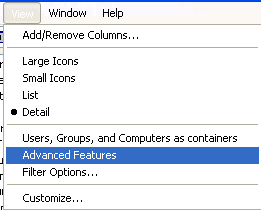
2. On the View menu, make sure that the Advanced Features option is
selected. If this option is not selected, the Security page will not be
visible for User account objects.

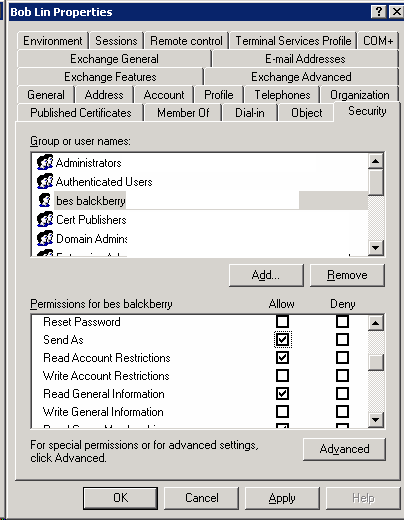
3. Open the properties of the user account that owns the mailbox.
4. Click the Security tab.
If the account is not already in the list of group or user names, add the
account that should have the Send As permission for this user.

5. In the Permissions box, click the Allow for the "Send As" permission for
the appropriate account.
6. Click OK.
7.Restart the Microsoft Exchange Information Store service on the affected
Exchange server.
Post your questions, comments, feedbacks and suggestions
Contact a consultant
Related Topics
|

This web is provided "AS IS" with no warranties.