|
Upgrade Windows Vista to Windows 7 - Step by
step with screenshots
Depending on the hardware, the current edition of Windows Vista and the
edition of Windows 7 you will install, you may have two options to install
Windows 7 on Vista, upgrade in place and custom installation or called clean
installation. If you want to keeps your files, settings, and programs from
Windows Vista, you may choose upgrade in place. However, if you donít need
to keeps your files, settings, and programs from Windows Vista, we recommend
to use clean installation for better performance.
To perform an Upgrade installation of Windows 7, please follow these steps:
1. Be sure your computer is running either Service Pack 1 or Service Pack 2
for Windows Vista
2. Turn on the Vista and connect your PC to the Internet so you can get
installation updates during the installation process
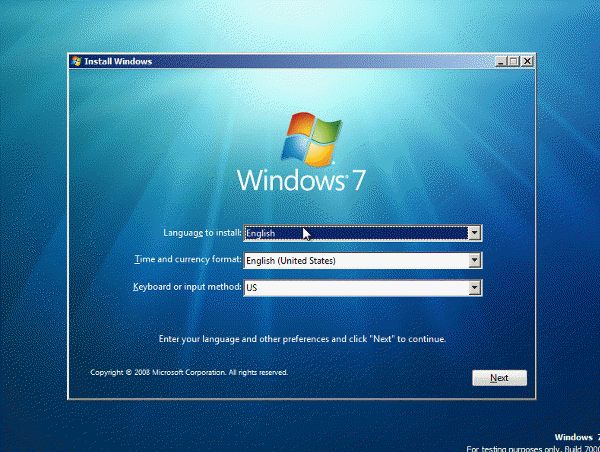
3. Insert Windows 7 DVD or run the Windows 7 setup from the download
location.
4. On the Install Windows page, click Next.

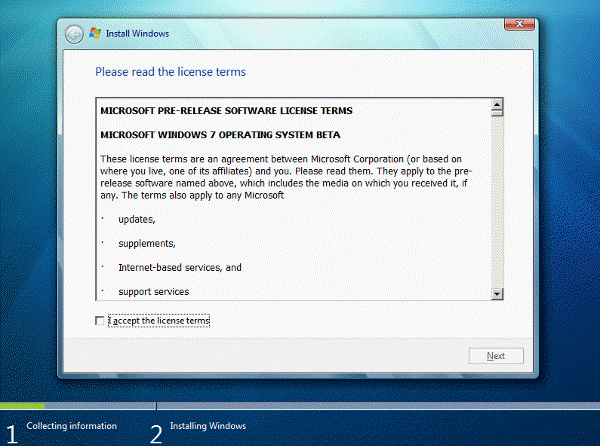
5. Check I accept the license term and
click Next.

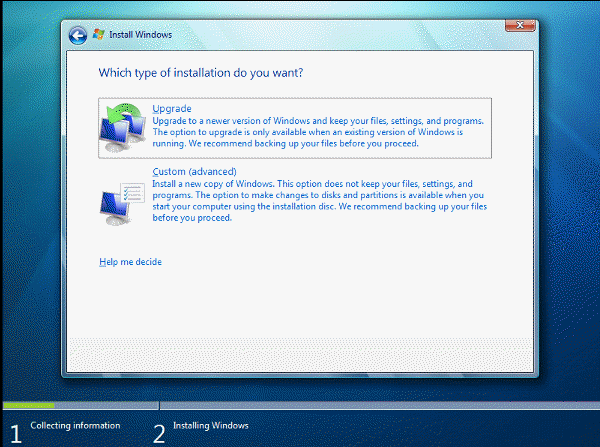
6. Click Upgrade to start the upgrade
process.

7. Continue to follow the instructions to finish installing Windows 7.
To install the new copy of the Windows 7, click Custom (advanced) or refer
to this page: How to Install Windows 7 Step by
Step
Post your questions, comments, feedbacks and suggestions
Contact a consultant
Related Topics
|
|

This web is provided "AS IS" with no warranties.